




What is the best ventilation setup for using BBQ coal?
 Jan 02, 2026|
 Hey there, fellow BBQ enthusiasts! As a BBQ coal supplier, I get asked a ton of questions about the best ways to use our products. One question that comes up again and again is about ventilation when using BBQ coal. So, today I'm gonna dive into what I think is the best ventilation setup for using BBQ coal.
Why Good Ventilation Matters
First things first, let's talk about why ventilation is such a big deal. When you burn BBQ coal, it releases carbon monoxide (CO), which is a colorless, odorless, and extremely dangerous gas. If you don't have proper ventilation, CO can build up to harmful levels, leading to headaches, dizziness, nausea, and even death in severe cases. So, having a good ventilation setup isn't just about getting the most out of your BBQ; it's a matter of safety.
Another reason for proper ventilation is that it helps control the temperature of your grill. Oxygen is essential for combustion, and by controlling the airflow, you can adjust how hot your coal burns. This is crucial for achieving that perfect sear on your steaks or slow-cooking a rack of ribs to tender perfection.
Types of Ventilation
There are a few different types of ventilation you can consider when using BBQ coal. Let's take a look at each one.
Natural Ventilation
Natural ventilation relies on the natural movement of air to supply oxygen to the fire and remove exhaust gases. This is the simplest type of ventilation and is often used in traditional charcoal grills. In a natural ventilation setup, air enters the grill through the bottom vents and exits through the top vents.

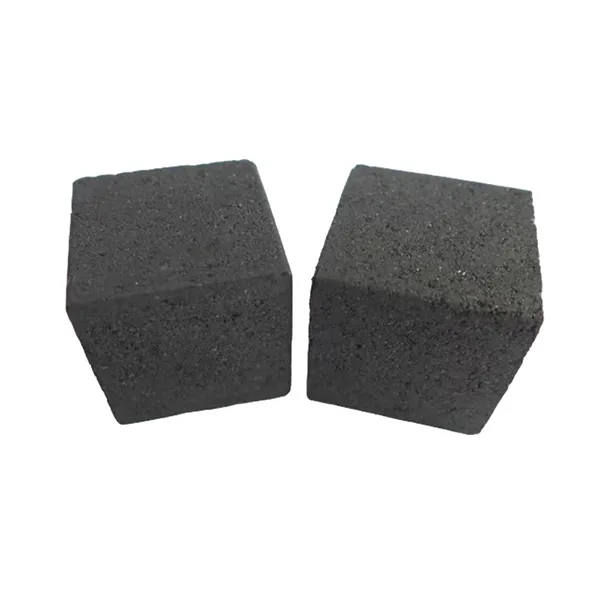
To optimize natural ventilation, you need to make sure your grill has enough intake and exhaust vents. Most charcoal grills have adjustable bottom vents that you can open or close to control the amount of air entering the fire. The top vents are also important, as they allow the hot air and exhaust gases to escape.
Forced Ventilation
Forced ventilation uses a fan or blower to move air through the grill. This can be a great option if you're looking for more precise temperature control or if you're using a large grill that requires a lot of oxygen. Forced ventilation systems can be built into the grill or added as an aftermarket accessory.
One of the benefits of forced ventilation is that it can help you achieve a more consistent temperature throughout the grill. This is especially useful when cooking large cuts of meat or when you need to maintain a low and slow cooking temperature for an extended period of time.
Chimney Starter Ventilation
A chimney starter is a great tool for lighting your charcoal quickly and easily. It works by using the natural draft of hot air rising through the chimney to draw oxygen into the bottom of the starter, which helps the charcoal ignite faster.
When using a chimney starter, it's important to make sure it has good ventilation. The starter should have holes at the bottom to allow air to enter and a chimney at the top to allow the hot air and smoke to escape. You can also place the chimney starter on a flat surface with plenty of clearance around it to ensure proper airflow.
The Best Ventilation Setup
So, what is the best ventilation setup for using BBQ coal? Well, it depends on a few factors, such as the type of grill you're using, the size of the grill, and the type of food you're cooking. However, I generally recommend a combination of natural and forced ventilation for the best results.
Step 1: Choose the Right Grill
The first step in creating the best ventilation setup is to choose the right grill. Look for a grill that has adjustable bottom and top vents. This will allow you to control the airflow and adjust the temperature of the grill as needed.
If you're planning on doing a lot of high-heat cooking, such as searing steaks or burgers, you might want to consider a grill with a larger vent area. This will allow more air to enter the fire, which will help you achieve higher temperatures.
Step 2: Set Up the Bottom Vents
Once you've chosen the right grill, it's time to set up the bottom vents. Open the bottom vents all the way to allow plenty of air to enter the fire. This will help the charcoal ignite faster and burn more efficiently.
If you're using a chimney starter to light the charcoal, you can place it directly on the bottom of the grill with the vents open. This will allow the hot air and smoke to escape through the top of the chimney starter, while the fresh air enters through the bottom vents.
Step 3: Set Up the Top Vents
The top vents are just as important as the bottom vents. They allow the hot air and exhaust gases to escape from the grill, which helps to prevent the buildup of carbon monoxide.
Open the top vents all the way when you first start the fire to allow the smoke and hot air to escape. As the fire burns, you can adjust the top vents to control the temperature of the grill. If you want to increase the temperature, open the top vents wider. If you want to decrease the temperature, close the top vents slightly.
Step 4: Consider Forced Ventilation
If you're using a large grill or if you're having trouble achieving the temperature you want with natural ventilation, you might want to consider adding a forced ventilation system. A forced ventilation system can help you achieve a more consistent temperature throughout the grill and can also help you cook food faster.
There are a few different types of forced ventilation systems available, including electric fans and blowers. You can choose the system that works best for your grill and your cooking needs.
Step 5: Monitor the Temperature
Once you've set up your ventilation system, it's important to monitor the temperature of the grill regularly. You can use a thermometer to check the temperature of the grill and adjust the vents as needed to maintain the desired temperature.
If you're cooking a large cut of meat, such as a brisket or a pork shoulder, you might want to use a meat thermometer to check the internal temperature of the meat. This will help you ensure that the meat is cooked to the proper doneness.
Using Different Types of BBQ Coal
When it comes to using different types of BBQ coal, there are a few things you need to keep in mind. Different types of coal burn at different temperatures and produce different amounts of heat, so it's important to choose the right coal for your cooking needs.
Charcoal Briquettes
Charcoal briquettes are a popular choice for BBQ because they burn evenly and produce a consistent amount of heat. They're also easy to light and last longer than other types of charcoal.
If you're using charcoal briquettes, make sure to arrange them in a single layer in the grill. This will allow for better airflow and more efficient combustion. You can also use a chimney starter to light the briquettes quickly and easily. For more information on using charcoal briquettes on your BBQ, check out Charcoal Briquettes On Bbq.
Large Charcoal Briquettes
Large charcoal briquettes are a great option if you're looking for a longer burn time. They're larger in size than regular charcoal briquettes, which means they take longer to burn and produce more heat.
When using large charcoal briquettes, it's important to make sure they're evenly spaced in the grill. This will allow for better airflow and more efficient combustion. You can also use a chimney starter to light the large briquettes, but you may need to use more charcoal to get the fire started. For more details on large charcoal briquettes, visit Large Charcoal Briquettes.
Instant Light Charcoal
Instant light charcoal is a convenient option if you're short on time. It comes pre-treated with a flammable substance that allows it to ignite quickly and easily.
However, instant light charcoal can produce more smoke and ash than other types of charcoal, so it's important to use it in a well-ventilated area. You can also let the charcoal burn for a few minutes before adding your food to the grill to allow the chemicals to burn off. To learn more about instant light charcoal, click Charcoal for Bbq Instant Light.
Conclusion
In conclusion, having a good ventilation setup is essential for using BBQ coal safely and effectively. By following the tips outlined in this blog post, you can create a ventilation system that will help you achieve the perfect temperature for your cooking needs.
Whether you're a beginner or an experienced BBQer, I hope this post has been helpful. If you have any questions or if you're interested in purchasing our high-quality BBQ coal, feel free to reach out. We're here to help you take your BBQ game to the next level!
References
- "Barbecue Basics: Understanding Ventilation." The Spruce Eats.
- "How to Control Temperature in a Charcoal Grill." Weber Grills.
- "The Importance of Ventilation in Charcoal Grilling." BBQGuys.